Supplies
2 2x4s cut to the desired height
Plywood cut to dimensions based on bed size
Foam
Batting
Fabric
Staple gun
Buttons, upholstery needle, and upholstery thread (if desired)
What I did
First measure the width of your bed to determine the width of plywood needed. A queen bed is a standard 60 inches wide. Then decided how high you want your headboard to be. I wanted my headboard to be 5 feet from the ground. I bought my wood at Home Depot and they will cut wood for you in store. I got 2 2x4s cut to 5 ft and my plywood cut down to 5 ft. Standard plywood is 4ft x 8 ft so my final piece was 4ft x 5 ft. (The 1 ft short in height is fine because it wont be seen either way). Once I got home, I attached the wood with screws so that the 2x4s were attached to either side of the plywood. At this point it you are planning on adding buttons, measure and drill holes into the plywood.
 |
| Headboard Frame |
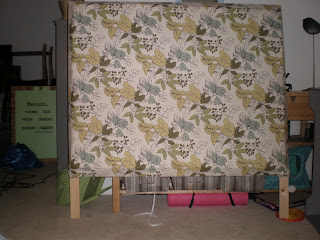
Next attach form to cover the plywood. It is MUCH cheaper to use multiple square pieces over one large piece of foam. I bought my foam on sale and they are 2 inches thick. Once the foam is attached, use batting to covered the edges and staple to the back of the frame. Lay out fabric on the floor and lay the frame on top. Using your staple gun, pull the fabric tight and stapled to the back of the frame. It is easiest to start in the center of one end and then go to the opposite side and pull tight. Once you have completely attached the fabric, you can add buttons if desired. To attach, screw the bottom of the 2x4s to your metal bed frame.
 |
| Completed Headboard |
I will update with new pictures once I move in and attach it to my bed.
Important tip when choosing fabric!
Pay attention to the way the patten is laid out. The original fabric I chose had a pattern that ran up and down when on the roll and it was not wide enough to use in that direction (i.e. if I used it the up and down would have run left to right and looked awkward).
What I'm working on next:
Time to attach the 2nd matching dresser.
No comments:
Post a Comment